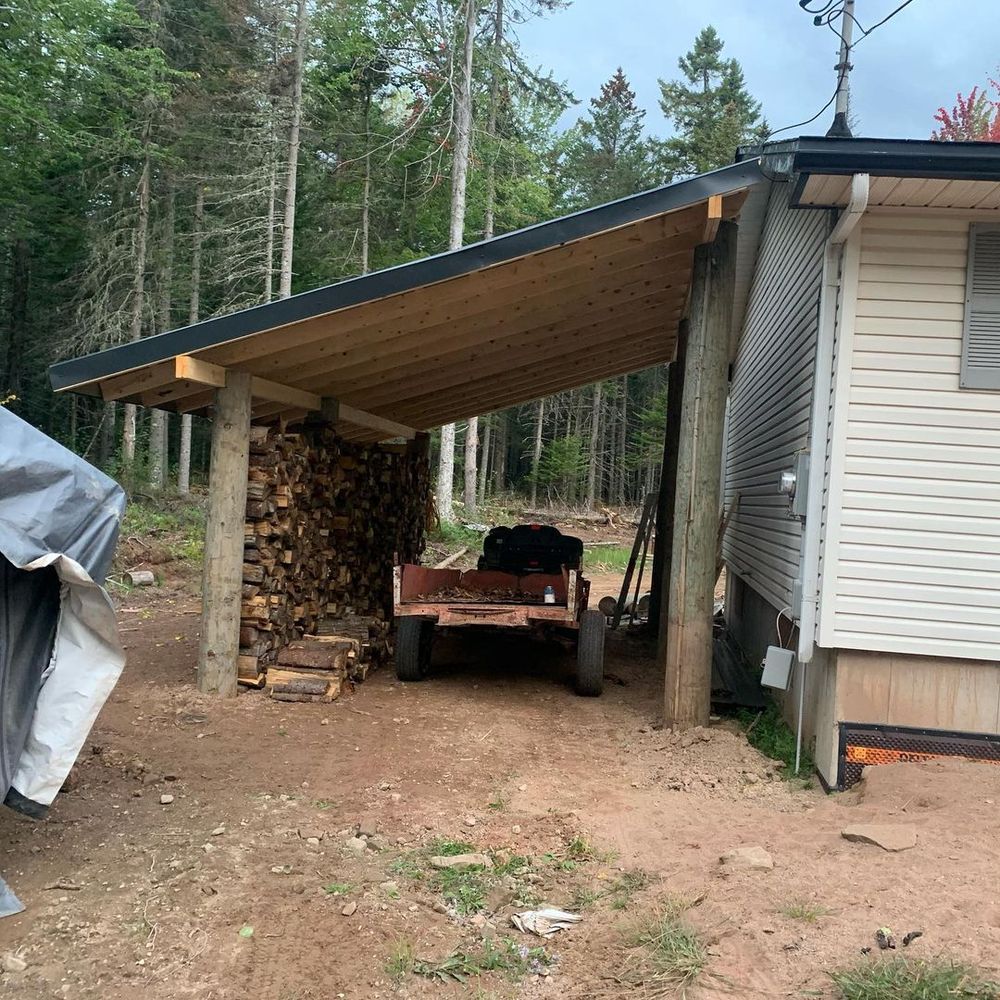
Build Your Own Lean-To Shed: A Simple DIY Project
Dreaming of extra storage space in your yard without breaking the bank? A lean-to shed is the perfect solution! This simple DIY project requires minimal carpentry skills and readily available materials, transforming a blank wall or fence into a functional and attractive addition to your property. Follow these steps to build your own lean-to shed and enjoy the satisfaction of a job well done.
Planning Your Lean-To Shed
Before you even touch a tool, careful planning is crucial. Measure the available space against your desired shed dimensions. Consider the existing wall or fence you'll be attaching the shed to â€" ensure it's sturdy enough to support the added weight. Sketch a simple design, noting the height, width, and depth you want. This will help you calculate the necessary materials and avoid costly mistakes later. Decide on the roofing material â€" corrugated metal is a durable and cost-effective option, but you can also use plywood with asphalt shingles for a more traditional look. Remember to check local building codes and obtain any necessary permits before beginning construction.
Choosing Your Materials
With your design finalized, create a comprehensive materials list. You’ll need pressure-treated lumber for the frame (resistant to rot and decay), roofing material of your choice, screws, nails, a level, measuring tape, and a post-hole digger (if ground support is needed). Consider adding extra screws and nails â€" it’s always better to have a few spares on hand than to run out mid-project. Remember to purchase materials slightly longer than calculated to allow for cutting and adjustments.
Constructing the Frame
Begin by building the frame's back wall. Cut and assemble the pressure-treated lumber to create a sturdy rectangular frame, ensuring all corners are square using a speed square. Secure the frame using screws, ensuring they're long enough to penetrate deeply into the lumber. Then, attach the frame to your existing wall or fence using strong brackets and long screws designed for exterior use. If your lean-to will have a separate foundation rather than attaching directly to an existing structure, dig post holes, set treated posts, and add concrete for support. Build a frame around those posts.
Erecting the Rafters
Next, construct the rafters. Cut the lumber to the required length, ensuring a slight overhang at the front for water runoff. Attach these rafters securely to the back wall and the front support beams (or posts), creating a sloping roofline. Check for levelness frequently throughout this step. Using appropriate spacing between rafters will provide stability and support for the roofing material. Ensure all connections are strong and secure.
Installing the Roofing and Finishing Touches
Now comes the rewarding part â€" installing the roofing material! Start at the bottom and work your way up, overlapping the sheets slightly to ensure a watertight seal. Secure the roofing material with appropriate fasteners, taking care not to damage the underlying structure. For corrugated metal, use roofing screws with rubber washers to create a watertight seal. For asphalt shingles, follow the manufacturer’s instructions carefully. Finish by adding any extra features you desire, such as a door or shelves. Remember to consider adding trim to enhance the look and further protect the shed from the elements.
Adding the Finishing Touches
Once the roofing is complete, add a simple door if desired, carefully measuring and installing it within the frame. Consider adding shelves inside for extra storage and organization. A coat of exterior-grade paint or stain will protect the wood and add a personal touch, matching your existing structures or your personal style.
Congratulations! You've successfully built your own lean-to shed. Enjoy your new storage space and the satisfaction of completing this rewarding DIY project. Remember to always prioritize safety by using appropriate safety gear during the construction process.


No comments:
Post a Comment
Note: Only a member of this blog may post a comment.